hwads
Vu+ Newbie
All credit to TV addons not me.
Follow the steps below.
At step 12 click start here, Then click 'plugin addon installer' and let it install it will tell you when its done.
Then go back to the home screen, click 'Programs' Then Addon installer.
Now you can choose any addon you like .Try 'featured addons' then 'genesis' (good for movies) or 'Navi-X'
Enjoy
Step 1: Navigate to the “File manager” tab under the “SYSTEM” menu.
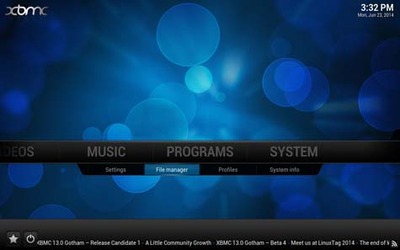
Step 2: Click on the “Add source” option.
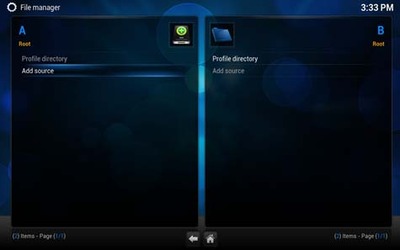
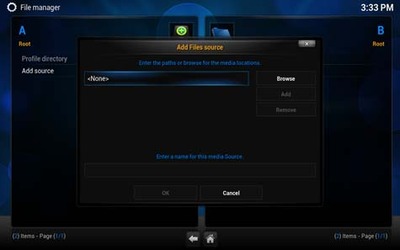
Step 3: Select the top text input box marked “<None>” under the “Enter the paths of browse for the media locations” field.
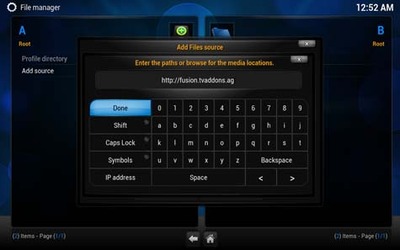
Step 4: Using the on-screen keyboard, type in “http://fusion.tvaddons.ag” without quotations, and then press the “Done” button. In case you’re having trouble, press the “Symbols” button to insert the colon and forward slashes.
Step 5: Select the bottom text input box under the “Enter a name for the media Source” field.
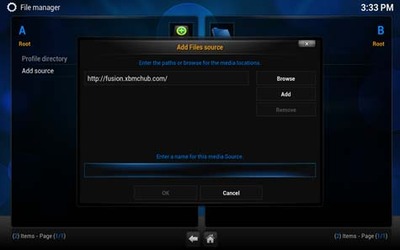
Step 6: Using the on-screen keyboard, type in “fusion” without quotations, and then press the “Done” button.
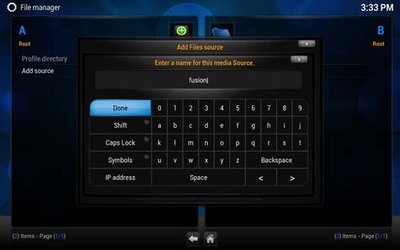
Step 7: Press the “OK” button at the bottom of the window.
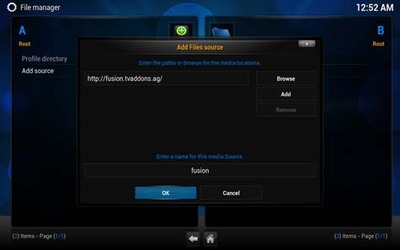
Step 8: You’ll now notice that “fusion” is listed within the “File manager” window.
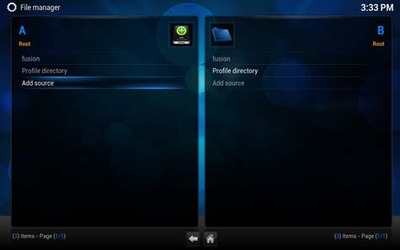
Step 9: Return to the main menu, then Navigate to the “Settings” tab under the “SYSTEM” menu.
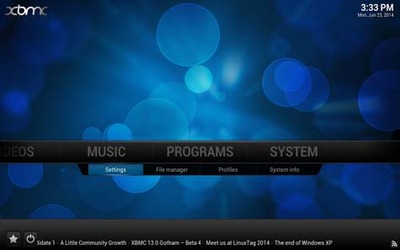
Step 10: Select the “Add-ons” option from the left side menu bar.
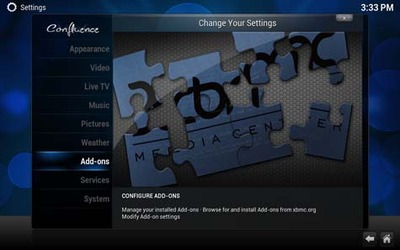
Step 11: Press the “Ok” button when prompted with the “First run help…” dialogue.
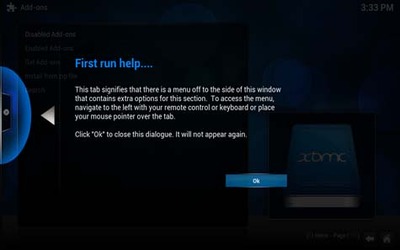
Step 10: Select the “Install from zip file” option.
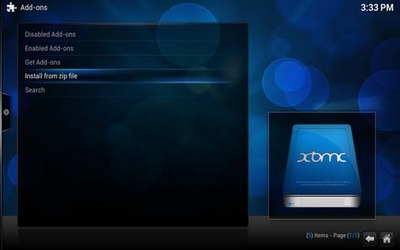
Step 11: Select the “fusion” folder from the listing.
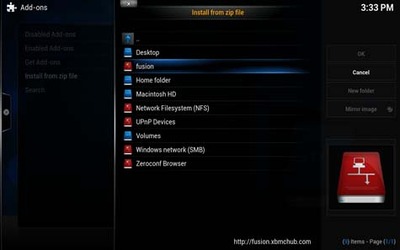
Step 12: You’ll now be able to open whichever folder from which you wish to install add-ons for Kodi.
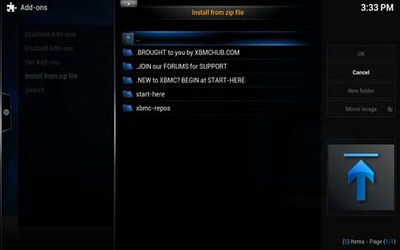
Recommended Method: You’ll find easy configuration tools such as the Config Wizard, Addon Installer and Fresh Start program add-ons within the “start-here” folder.
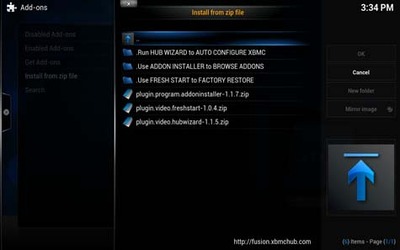
Follow the steps below.
At step 12 click start here, Then click 'plugin addon installer' and let it install it will tell you when its done.
Then go back to the home screen, click 'Programs' Then Addon installer.
Now you can choose any addon you like .Try 'featured addons' then 'genesis' (good for movies) or 'Navi-X'
Enjoy
Step 1: Navigate to the “File manager” tab under the “SYSTEM” menu.

Step 2: Click on the “Add source” option.

Step 3: Select the top text input box marked “<None>” under the “Enter the paths of browse for the media locations” field.

Step 4: Using the on-screen keyboard, type in “http://fusion.tvaddons.ag” without quotations, and then press the “Done” button. In case you’re having trouble, press the “Symbols” button to insert the colon and forward slashes.

Step 5: Select the bottom text input box under the “Enter a name for the media Source” field.

Step 6: Using the on-screen keyboard, type in “fusion” without quotations, and then press the “Done” button.

Step 7: Press the “OK” button at the bottom of the window.

Step 8: You’ll now notice that “fusion” is listed within the “File manager” window.

Step 9: Return to the main menu, then Navigate to the “Settings” tab under the “SYSTEM” menu.

Step 10: Select the “Add-ons” option from the left side menu bar.

Step 11: Press the “Ok” button when prompted with the “First run help…” dialogue.

Step 10: Select the “Install from zip file” option.

Step 11: Select the “fusion” folder from the listing.

Step 12: You’ll now be able to open whichever folder from which you wish to install add-ons for Kodi.

Recommended Method: You’ll find easy configuration tools such as the Config Wizard, Addon Installer and Fresh Start program add-ons within the “start-here” folder.

